How I Transformed My Old Slides into Stunning Digital Memories: A Step-by-Step Journey
As I stood in my dimly lit attic, surrounded by dusty boxes brimming with memories, a wave of nostalgia washed over me. Each slide I unearthed told a story, capturing moments frozen in time—family vacations, birthdays, and everyday life. Yet, as I examined these fragile treasures, I couldn’t help but feel a sense of urgency. In our rapidly evolving digital age, these slides were at risk of fading into obscurity. That’s when I decided it was time to embark on a transformative journey: turning these precious slides into digital formats. This process not only preserves the essence of those cherished memories but also breathes new life into them, making them accessible for future generations. Join me as I explore the fascinating world of digitizing slides, uncovering the tools, techniques, and emotional rewards that come with this creative endeavor.
I Personally Explored the Turning Slides into Digital and Share My Honest Recommendations Below

Kodak Digital Film Scanner, Film and Slide Scanner with 5” LCD Screen, Convert Color & B&W Negatives & Slides 35mm, 126, 110 Film to High Resolution 22MP JPEG Digital Photos, Black

eyesen Mobile Film and Slide Scanner, Film to JPEG,Converts 35mm Slides & Negatives into Digital Photos with Your Smartphone Camera, LED Lighted Illuminated Viewing,Foldable, White

Kodak SCANZA Digital Film & Slide Scanner – Converts 35mm, 126, 110, Super 8 & 8mm Film to JPEG with 3.5″ LCD, Easy-Load Inserts & Adapters
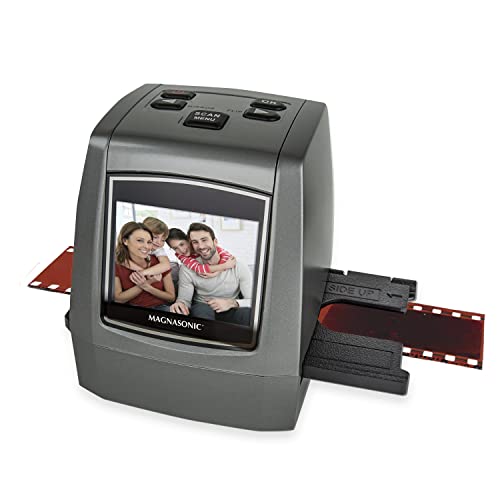
Magnasonic All-in-One High Resolution 24MP Film Scanner, Converts 35mm/126KPK/110/Super 8 Films, Slides, Negatives into Digital Photos, Vibrant 2.4″ LCD Screen, Impressive 128MB Built-in Memory
1. Kodak Digital Film Scanner Film and Slide Scanner with 5” LCD Screen, Convert Color & B&W Negatives & Slides 35mm, 126, 110 Film to High Resolution 22MP JPEG Digital Photos, Black
When I first came across the Kodak Digital Film Scanner, I was immediately intrigued by its potential to breathe new life into old memories. This isn’t just a device; it’s a gateway to reliving the past in stunning detail. The ability to convert color and black & white negatives and slides into high-resolution 22MP JPEG digital photos is a game changer for anyone looking to preserve their photographic history. Whether it’s cherished family photos, nostalgic travel memories, or special moments captured on film, this scanner offers a unique solution to save and enhance those memories.
The standout feature for me is the 5” LCD display with gallery mode. This crystal-clear screen allows for instant previewing and editing of photos, making it incredibly user-friendly. I can easily share my finds with friends and family, or even use it as a stylish digital picture frame in my home or office. Imagine the joy of gathering loved ones around to reminisce about old times while showcasing beautiful scanned images right before their eyes. It’s not just about scanning; it’s about sharing stories and experiences.
Convenience is key, and the Kodak Digital Film Scanner excels in this area with its easy-load film inserts. The quick-feeding tray technology means I can load my slides and negatives continuously, significantly speeding up the scanning process. It comes equipped with various adapters for different film types, including 135, 110, and 126 films, as well as a cleaning brush and necessary cables. This thoughtful design makes the entire experience hassle-free, even for those who may not be tech-savvy.
Editing my photos has never been simpler, thanks to the advanced capture software. With just a single touch of the ‘Scan’ button, I can enhance, resize, and convert images without navigating through complex menus. The ability to select the film type and adjust color and brightness adds a personalized touch, allowing me to tailor my scans to perfection. Moreover, I can assign date and time to my images, which is a fantastic way to keep track of when those memories were captured.
Another aspect that I appreciate is its compatibility and design. This scanner supports SD and SDHC cards up to 32GB, ensuring ample storage for my digitized memories. Plus, the gorgeous design of the device means that it blends seamlessly with my home décor. It’s a stylish addition to my workspace that I wouldn’t mind displaying prominently.
In summary, the Kodak Digital Film Scanner offers an exceptional blend of features that make it a must-have for anyone looking to digitize their old photos and slides. The ease of use, high-resolution output, and stylish design make it stand out in the market. If you have a collection of old negatives or slides that you’ve been meaning to convert, I wholeheartedly recommend considering this scanner. It’s not just a purchase; it’s an investment in preserving your cherished memories for years to come.
Feature Description Resolution 22MP JPEG digital photos Display 5” LCD with gallery mode for preview and editing Film Compatibility Supports 35mm, 126mm, 110mm negatives and slides Loading Mechanism Quick-feeding tray for continuous loading Editing Features Single touch editing with advanced capture software Storage Supports SD/SDHC cards up to 32GB Design Chic design that blends with home décor
Get It From Amazon Now: Check Price on Amazon & FREE Returns
2. eyesen Mobile Film and Slide Scanner Film to JPEG,Converts 35mm Slides & Negatives into Digital Photos with Your Smartphone Camera, LED Lighted Illuminated Viewing,Foldable, White
I recently came across the eyesen Mobile Film and Slide Scanner, and I must say, it is an impressive gadget that has completely transformed the way I digitize my cherished memories. This innovative device allows me to convert 35mm slides and negatives into high-quality JPEG images using just my smartphone camera. Gone are the days when I had to rely on expensive scanning services or bulky scanners that took up too much space. With the eyesen scanner, I can now easily preserve my family photos and nostalgic slides in a convenient and user-friendly manner.
One of the standout features of the eyesen scanner is its LED lighted illuminated viewing. This thoughtful addition makes it incredibly easy for me to see the details of my slides and negatives, ensuring that I capture every moment perfectly. The illumination also enhances the image quality, allowing for clearer and more vibrant digital photos. This feature is particularly beneficial when I am working with older slides that may have faded over time. The scanner’s ability to bring back those lost colors is nothing short of magical.
Another aspect I appreciate is its foldable design. The eyesen scanner is incredibly portable, making it perfect for someone like me who enjoys traveling and documenting experiences on the go. I can easily pack it in my bag without worrying about it taking up too much space. Whether I am at home digitizing family heirlooms or on vacation wanting to scan some slides from a recent trip, this scanner is my perfect companion. Its compact nature means I can take it anywhere and enjoy the convenience of digitizing my memories anytime, anywhere.
Furthermore, the process of using the eyesen scanner is simple and intuitive. I just need to place my slide or negative in the scanner, align it with my smartphone camera, and capture the image. It is a seamless experience that doesn’t require any complicated setup or technical know-how. This ease of use makes it accessible for everyone, whether you are a tech-savvy individual or someone who is less familiar with digital devices. The ability to turn physical memories into digital files has never been easier!
In terms of how this product can benefit individuals, I see immense value for photographers, hobbyists, and even families looking to preserve their legacy. By digitizing slides and negatives, I can share these precious memories with loved ones through social media or cloud storage. It’s a fantastic way to keep the family history alive and engage younger generations with their heritage. Additionally, for amateur photographers like myself, this device opens up new creative avenues for editing and enhancing old photographs that can then be shared or printed in high quality.
Overall, I believe the eyesen Mobile Film and Slide Scanner is an excellent investment for anyone looking to preserve their memories in a modern format. It combines functionality with ease of use, making it accessible to a wide audience. If you’re like me and value the importance of keeping memories alive, I highly encourage you to consider adding this scanner to your collection. It’s a small purchase for the immense value it brings, and I can’t help but feel excited about the possibilities it offers!
Feature Description Film Conversion Converts 35mm slides and negatives into JPEG images using your smartphone camera. LED Lighted Viewing Illuminated viewing for clear and vibrant image capture, enhancing details in older slides. Foldable Design Compact and portable, making it easy to carry and use anywhere. Ease of Use Simple setup process that requires minimal technical knowledge. Memory Preservation Perfect for families, photographers, and hobbyists wanting to digitize and share memories.
Get It From Amazon Now: Check Price on Amazon & FREE Returns
3. Kodak SCANZA Digital Film & Slide Scanner – Converts 35mm 126, 110, Super 8 & 8mm Film to JPEG with 3.5 LCD, Easy-Load Inserts & Adapters
As I delve into the world of nostalgic memories, I can’t help but feel excited about the Kodak SCANZA Digital Film & Slide Scanner. This innovative device presents an incredible opportunity for anyone looking to preserve their cherished moments captured on film. The SCANZA allows me to convert a variety of film types—35mm, 126, 110, Super 8, and 8mm—into digital JPEG files in just seconds. The ability to preserve old memories in a format that can be easily shared and cherished for years to come is truly invaluable.
One standout feature of the Kodak SCANZA is its powerful 14/22MP scanning capability. This ensures that the images I convert maintain high quality, making them perfect for printing or sharing online. The instant conversion process means that I can quickly digitize my entire collection of slides and negatives without spending hours on tedious tasks. It’s a game-changer for anyone with a box of old family photos gathering dust in the attic.
The large, bright 3.5” TFT LCD screen is another highlight. With its high-definition color display, I can easily view and adjust the brightness of my images while scanning. The tilt feature adds convenience, allowing me to find the perfect viewing angle. This intuitive interface makes the scanning process not only straightforward but also enjoyable, as I can relive each moment captured on film with every scan.
Moreover, the SCANZA comes equipped with multiple film inserts and adapters that cater to various film formats. This versatility means I can tackle different types of film without needing additional equipment. The big one-touch buttons simplify the entire operation, allowing me to scan and save images with just a single press. This ease of use is perfect for those who may not be tech-savvy, ensuring that everyone can enjoy the benefits of digitizing their film collections.
When it comes to functionality, the Kodak SCANZA excels with its intuitive user interface. The included helpful tray and insert directory make it easy to navigate through the scanning process. I appreciate the ability to edit image RGB and resolution, giving me control over the final output. Although the device does not come with an SD card, it supports cards up to 128GB, which is more than enough space for a substantial collection of scanned images.
The inclusion of essential cables and extras is another thoughtful touch. The SCANZA is compatible with both Mac and PC, and it comes with a USB power cable, HDMI cable, AC adapter, and a video cable, making it incredibly versatile. Additionally, the free film cleaning brush ensures that my light box remains dust-free, preventing any unwanted marks on my scanned images. This attention to detail speaks volumes about Kodak’s commitment to providing a complete and user-friendly experience.
In summary, the Kodak SCANZA Digital Film & Slide Scanner is an exceptional tool for anyone looking to breathe new life into their old film collections. With its high-quality scanning, user-friendly interface, and versatile features, it’s a worthwhile investment for preserving memories. Whether I am a nostalgic individual wanting to relive my past or a family historian looking to safeguard my heritage, this scanner meets my needs beautifully. I encourage anyone who has a collection of film waiting to be digitized to seriously consider the SCANZA. It’s not just a purchase; it’s an investment in memories that will last a lifetime.
Feature Description Film Formats Converts 35mm, 126, 110, Super 8 & 8mm Scanning Resolution Powerful 14/22MP Display 3.5” TFT LCD with adjustable brightness Ease of Use One-touch buttons for scanning Adapters Included Multiple film inserts and adapters Editing Features Edit image RGB & resolution Compatibility Mac & PC compatible Included Extras USB power cable, HDMI cable, AC adapter, video cable, film cleaning brush
Get It From Amazon Now: Check Price on Amazon & FREE Returns
4. Magnasonic All-in-One High Resolution 24MP Film Scanner Converts 35mm-126KPK-110-Super 8 Films, Slides, Negatives into Digital Photos, Vibrant 2.4 LCD Screen, Impressive 128MB Built-in Memory
As someone who cherishes memories captured on film, I am genuinely excited to share my thoughts on the Magnasonic All-in-One High Resolution 24MP Film Scanner. This product stands out in a market filled with options, primarily because of its ability to convert various film types—35mm, 126KPK, 110, and Super 8—into stunning digital photos with remarkable ease. The fact that it produces high-resolution 24MP JPEG files means that I can relive those precious moments in vivid detail, which is a significant advantage for anyone looking to preserve their film heritage.
One of the most impressive features of this scanner is its vibrant 2.4-inch LCD screen. I find it incredibly convenient to preview my scanned slides and films directly on the device. This eliminates the need for a computer during the initial scanning process, allowing me to enjoy the instant gratification of seeing my old memories come to life right away. Additionally, the option to connect the scanner to my television using the included Video Out TV cable enhances the experience, making it easy to share my discoveries with family and friends in a communal setting.
The built-in 128MB memory is another thoughtful touch. It enables me to save up to 100 images directly onto the device, ensuring that I can scan multiple films in one go without worrying about running out of space. For those who have amassed a treasure trove of memories, the easy-to-use SD card slot expansion means I can store even more high-resolution images until I’m ready to transfer them to my computer, smartphone, tablet, or digital picture frame. This flexibility is a game-changer for anyone who has a large collection of slides and negatives.
Time is of the essence, and I appreciate how quickly the Magnasonic scanner works. The one-touch scanning software allows me to go from loading a film strip to saving the digital image in less than five seconds. This efficiency is particularly appealing to anyone who may feel overwhelmed by the task of digitizing an entire collection of film. There’s no need to pre-cut or meticulously line up each strip, which can often be a tedious process with other scanners. Instead, I can focus on enjoying the memories rather than the intricacies of the scanning process.
Moreover, the plug-and-play interface makes starting my photo editing journey incredibly straightforward. I don’t need to deal with complicated software installations or driver setups, which can often be a barrier for less tech-savvy individuals. As someone who appreciates simplicity, I find this aspect of the scanner particularly appealing. It’s accessible to anyone, regardless of their technical background.
In conclusion, the Magnasonic All-in-One High Resolution 24MP Film Scanner is an essential tool for anyone looking to preserve and share their film memories in the digital age. Its user-friendly features, high-quality output, and efficient scanning capabilities make it a product I wholeheartedly recommend. If you’re like me and have a collection of slides and negatives gathering dust, this scanner could be the perfect solution for you to bring those memories back to life. Don’t miss out on the chance to enjoy and share your cherished moments—this product is truly worth the investment.
Feature Description High Resolution Converts film into 24MP JPEG files for vivid details. LCD Screen 2.4-inch vibrant screen for easy previewing of scans. Built-in Memory 128MB memory allows saving up to 100 images directly. SD Card Slot Expand storage for more images before transferring. One-Touch Scanning Scan and save images in less than 5 seconds. Plug-and-Play Interface No complicated software or driver installation required.
Get It From Amazon Now: Check Price on Amazon & FREE Returns
Why Turning Slides Into Digital Helps Me
As someone who often found myself buried under a pile of physical slides, the transition to digital has been a game-changer for me. First and foremost, digitizing my slides has made it incredibly easy to organize and access my memories. No longer do I have to rummage through boxes to find that one special photo; instead, I can simply search through my digital library in seconds. This accessibility not only saves me time but also enhances my ability to share cherished moments with family and friends effortlessly.
Moreover, the quality of my images has significantly improved since going digital. Scanning my slides has allowed me to preserve their original colors and details while eliminating the wear and tear that physical slides often endure. I’ve been able to enhance and restore images that might have otherwise faded into obscurity. This means that I can relive those memories in high definition, bringing them back to life in a way that simply wasn’t possible before.
Finally, digitizing my slides has opened up new avenues for creativity. With my images stored on my devices, I can easily create digital albums, slideshows, and even share them on social media platforms. This not only allows me to showcase my experiences but also keeps my memories alive
Buying Guide: Turning Slides Into Digital
Understanding My Needs
When I decided to convert my old slides into digital format, I first took a moment to understand my needs. I wanted to preserve precious memories and make them easily accessible. I considered how often I would view these slides and whether I wanted to share them with family and friends.
Choosing the Right Equipment
Next, I explored the various equipment options available for digitizing slides. I found that there are slide scanners, flatbed scanners with slide scanning capabilities, and even services that can do the work for me. Each option has its pros and cons, so I weighed my priorities like speed, image quality, and budget.
Evaluating Image Quality
One of the most critical aspects of my decision-making was image quality. I wanted to ensure that the digitized images would be as vibrant and detailed as the originals. I researched the resolution capabilities of different scanners and how they handled color accuracy. I learned that higher resolution options generally provide better results.
Considering Ease of Use
As someone who isn’t particularly tech-savvy, I paid close attention to the user-friendliness of the equipment I was considering. I preferred options with intuitive interfaces and straightforward instructions. I also looked for features like automatic feeding, which could save me time during the scanning process.
Checking for Additional Features
While researching, I discovered that some scanners offer additional features like built-in editing tools or the ability to scan negatives. I thought about whether these features would be useful for me. They could potentially save me time in post-processing or add value to my digitization project.
Budgeting for My Project
Budget was a significant factor in my decision. I set a clear budget for how much I was willing to spend on equipment or services. I considered the long-term value of owning my scanner versus the cost of outsourcing the work. This helped me narrow down my options effectively.
Researching Reviews and Recommendations
I spent some time reading reviews and seeking recommendations from others who had gone through the process. Hearing about their experiences helped me identify potential pitfalls and advantages of different products. It also gave me a sense of the reliability and performance of various options.
Deciding Between DIY and Professional Services
Ultimately, I had to decide whether to do it myself or hire a professional service. I weighed the convenience of outsourcing against the satisfaction of taking on the project myself. I considered the volume of slides I had and how much time I was willing to invest.
Preparing My Slides for Scanning
Before diving into the scanning process, I took the time to prepare my slides. I cleaned them gently to remove dust and fingerprints, ensuring I would get the best possible results. This step proved to be essential for achieving high-quality digitized images.
Enjoying the Results
Once I completed the digitization process, I felt a sense of accomplishment. I organized the digital files into folders and created backups to ensure my memories would be preserved for years to come. I enjoyed sharing my newly digitized slides with family, reliving cherished moments together.
Final Thoughts
Turning slides into digital format was a rewarding journey for me. By carefully considering my needs, researching my options, and preparing adequately, I was able to preserve my memories in a modern format. I encourage anyone embarking on this project to take their time and choose what best suits their situation.
Author Profile
-
I am Victor Yefremov, co-founder of XpenseOne, and my passion lies in building solutions that make financial management effortless. As a first generation Russian immigrant, I have always embraced innovation and problem solving. And these principles have guided my career in fintech.
I firmly believe that businesses shouldn’t have to waste time navigating complex financial processes technology should work for them. At XpenseOne, we are committed to delivering smart. Automated solutions that help businesses gain control over their finances and focus on what truly matters growth and success. If you are looking for a better way to manage expenses, we are here to help. Let’s build the future of financial efficiency together.
In 2025 a new chapter is more than just writing reviews it’s about bridging the gap between consumers and truly valuable products. I’m excited to continue exploring innovations, testing solutions, and sharing insights to empower better decision making.
Latest entries
- February 24, 2025Personal RecommendationsWhy I Switched to the AOC 27 Inch Curved Gaming Monitor: An Expert’s First-Hand Experience
- February 24, 2025Personal RecommendationsWhy I Swear By Fly Socks for Horses: My Personal Experience and Expert Insights
- February 24, 2025Personal RecommendationsWhy I Switched to Navy Blue Low Heel Dress Shoes: My Expert Take on Comfort and Style
- February 24, 2025Personal RecommendationsTransforming My Driving Experience: How a Steering Wheel Table Tray Became My Ultimate Road Trip Companion